VTube Diameter Cut Plane (DCP)
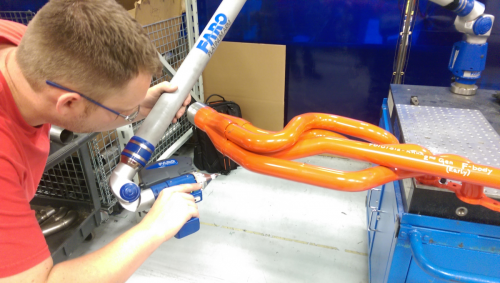
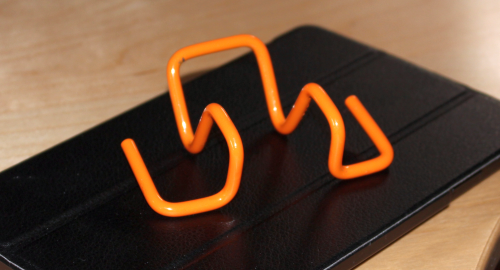
VTube-LASER Diameter Cut Planes or the "DCP" feature in VTube-LASER, solves a scanning issue where multiple objects are in the view of the laser scanner at one time - but you must scan only one straight. In versions before DCP was available, the only solution was to switch to using the ball probe in those sections where many objects were close to the tube straight being measured. An example of how DCP is used is for header assemblies like this one at Holley MSD. The only way to laser scan this header assembly is to use the DCP feature.
DCP was added to VTube-LASER on July 25, 2016 in version 2.6.
Videos Showing DCP
Video 60: Diameter Cut Plane - Quick Tutorial
Michael Cone explains the concept behind the DCP (Diameter Cut Plane) feature and demonstrates how it works. This is a new innovation added in version 2.6. |
Video 59: Diameter Cut Plane - Quick Demo
This video shows what you can do with the DCP (Diameter Cut Plane) feature added in version 2.6. With DCP, even if the laser stripe is crosses multiple straights at the same time, it finds and keeps the closest one - on-the-fly. It even filters out non-diameter objects that are behind the top diameter. |
Overview of DCP
Measure Across Several Diameters - VTube will find the correct straight
However, this new feature lets you scan across several diameters or objects of any kind - and still AUTOMATICALLY scan in the single diameter you intend to measure.
The effect on the operator is to reduce stress and increase measuring speed drastically. See this image to understand the basic idea of the DCP feature and how it sorts detects the single diameter you intend to measure:
Wirebending Applications
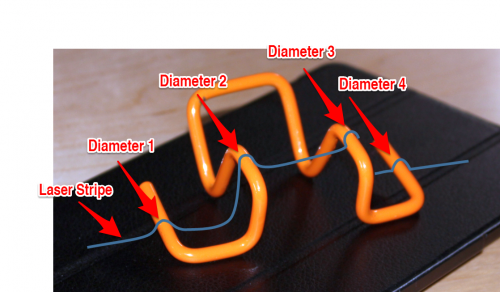
Illustration of the Issue for Small Parts
In previous versions of VTube-LASER, this was not possible because the data from the four straights would have averaged into one large diameter, or, more likely, VTube would return an error during centerline calculation.
However, the DCP feature solves this issue by giving the operator a way to cross all four straights by following some simple rules that allow VTube to sort out and select the one straight that you intend to measure.
DCP is Not Used in End Scans
Even if DCP is enabled, it is never applied to END SCANS since end scans are not actual DIAMETER measurements. End scans only respond to regular cut planes.
Tutorial on How DCP Works
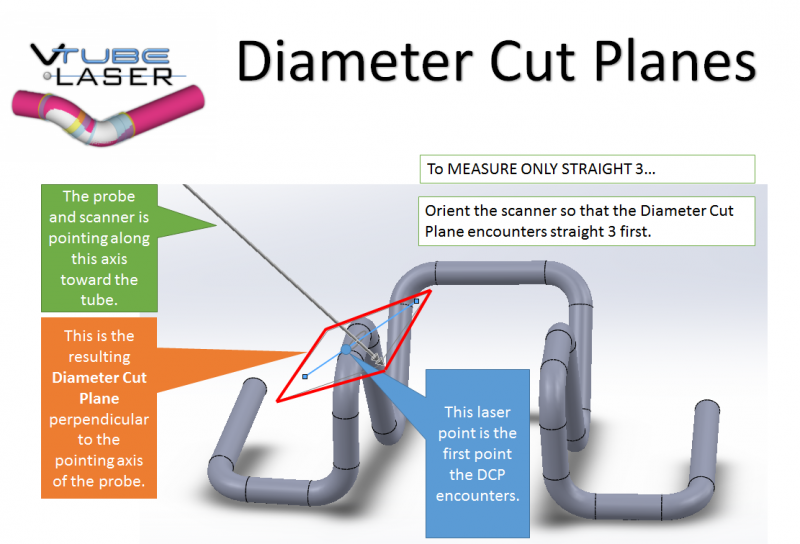
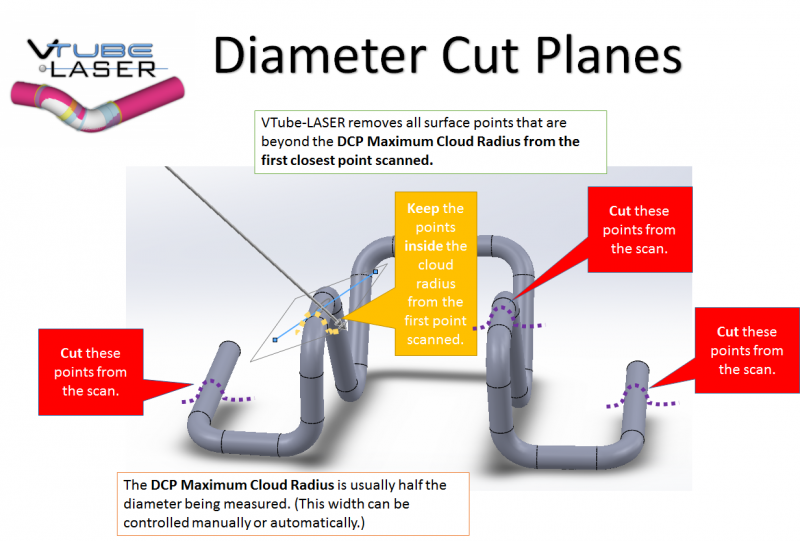
These images illustrate how the DCP feature works:
Scanner Orientation Matters in DCP
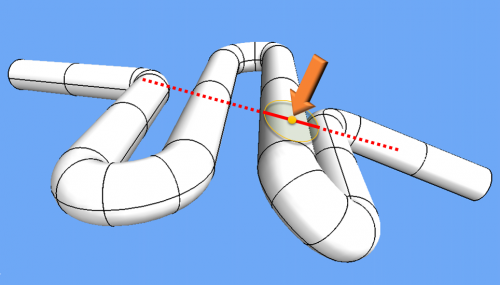
See this idea illustrated in the serpentine part. The orange arrow is the orientation of the scanner.
- DCP Selection Rule 1: The scanned points are selected based on the orientation of the Diameter Cut Plane relative to the straight.
Maximum Cloud Width Matters in DCP
The yellow ellipsis represents the Maximum Cloud Radius.
The second key is to remember is:
- DCP Selection Rule 2: The scanned points are selected based on the Maximum Cloud Radius value.
DCP Setup Warning Windows
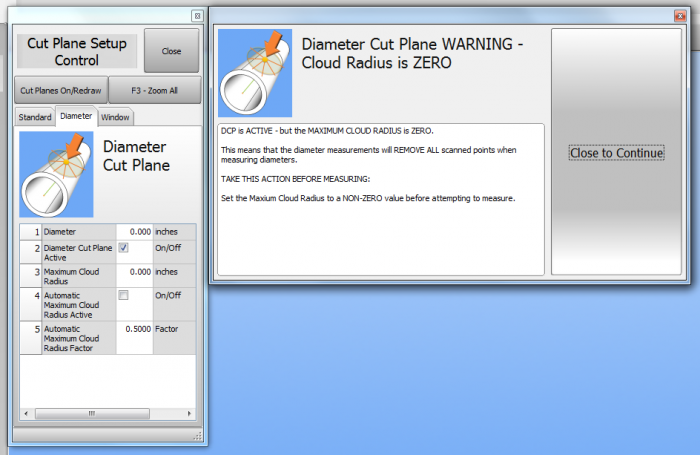
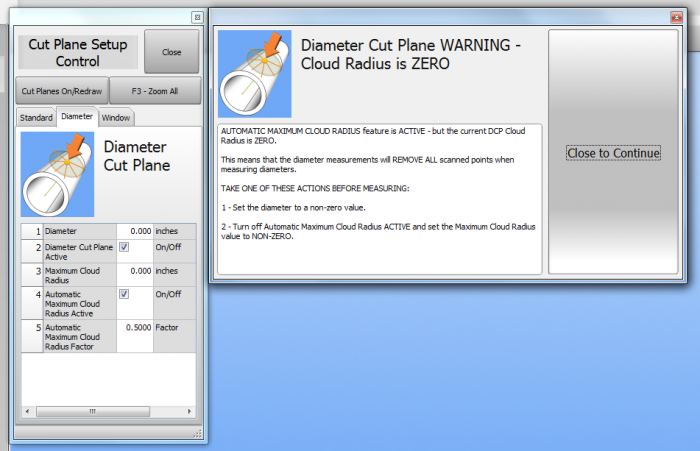
VTube has warning windows that help you know when the DCP feature is setup in a way that will cause VTube-LASER to return no scanned points.
- If you activate the DCP feature and the maximum cloud radius value goes to ZERO, then these warnings will appear.
- If you load a project with the DCP feature setup with the maximum cloud radius value at ZERO, then one of these warnings will appear.
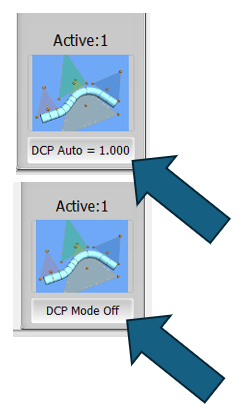
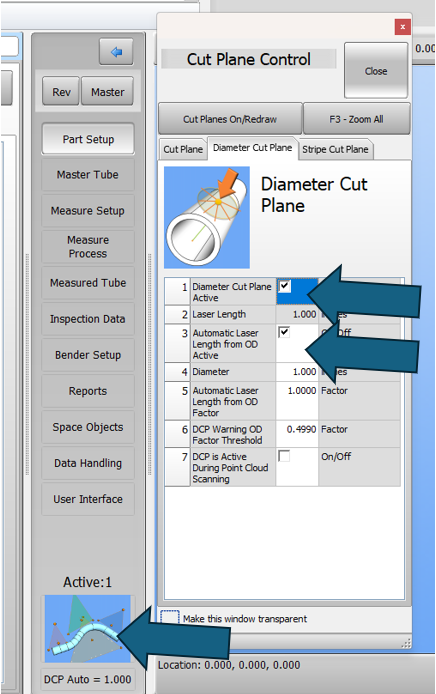
Turning on/off the DCP
To toggle the DCP on or off, users can click on the small button under the Cut Plane Control.
Or go into the Cut Plane control and check boxes 1 and 3 under the Diameter Cut Plane tab.

